

Rotor Ink sketches are extremely time-consuming to create. I had earlier posted how you can evaluate whether you want to create pencil or ink sketches here.
The method used to choose the type of paper remains the same as with pencil sketches. However the other items required are different. Here is a snapshot of the equipment required to create ink sketches.
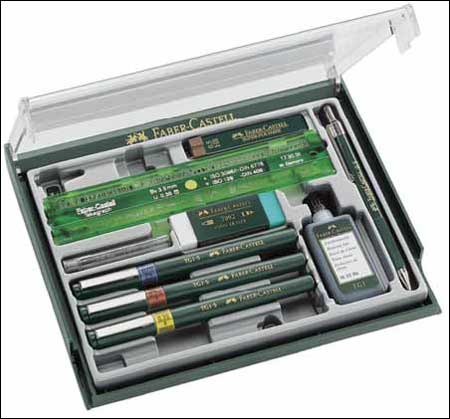
Rotor Ink Pens
Rotor Ink pens primarily differ from each other due to the thickness and shape of the nibs. They tend to be rather fragile and require some maintenance and cleaning. They are generally quite expensive, so make sure you maintain them well. Investing in a good set is worth the money because the better sets tend to be easier to maintain and draw with.
A full set of pens would have the following nib sizes: 0.13, 0.18, 0.25, 0.35, 0.5, 0.7, 1.0, 1.5, and 2.0 mm.
Here is a more detailed view of a pen.

Make sure you use water soluble inks in the pen so that cleaning the pen is easy. These pen nibs are extremely delicate. If you do not clean the nibs before use, the ink could have dried at the tip of the nib.
A major point for using ink pens is that you can use different colored inks to highlight various portions of your drawings.
Ink Erasers
Editing ink drawings is extremely difficult unless you have an eraser of very good quality. The image that shows the complete set at the top of this post shows a dual eraser (one side for pencil and the other for ink).
For extremely difficult edits, use whitening ink or whitening pens as shown below.


No comments:
Post a Comment